Are your leggings feeling a bit loose around the waist? Don’t worry, I’ve got you covered! In this article, I’ll guide you through various methods to make your leggings tighter and ensure a more comfortable fit. Whether you prefer DIY techniques or sewing adjustments, there’s a solution for everyone. Say goodbye to sagging waistbands and hello to perfectly snug leggings!
Key Takeaways:
- Washing leggings in hot water and drying them on high heat can shrink the fabric and make the waistband tighter.
- Ironing damp leggings with low to medium heat can also help tighten the waistband.
- Spritzing leggings with water and drying them with heat is a quick alternative to washing.
- For leggings with sewn-in elastic, sew a smaller elastic alongside the existing one to tighten the waistband.
- Attaching a narrow elastic or using underlining fabric can provide stability and shape to the waistband.
Method 1: Wash and Dry with Hot Water
One effective method to make leggings tighter around the waist is by washing and drying them with hot water. This method works well for fabrics that are prone to shrinking, such as cotton or polyester. To begin, fill your washing machine with hot water and add your leggings.
Choose a hot water wash and rinse cycle, and select the longest wash cycle setting available. This will allow for maximum heat, water, and friction, which will help tighten the waistband. After the washing cycle is complete, transfer the leggings to the dryer and set it to high heat. The heat from the dryer will further shrink the fabric, resulting in a tighter waistband.
Method 1: Wash and Dry with Hot Water
| Materials needed | Steps |
|---|---|
| Leggings | 1. Fill washing machine with hot water. |
| – Hot water wash and rinse cycle | 2. Add leggings to the washing machine. |
| – Longest wash cycle setting | 3. Set the washing machine to the longest wash cycle setting. |
| – Dryer with high heat setting | 4. Transfer the leggings to the dryer. |
| 5. Set the dryer to high heat and dry the leggings. |
It’s important to note that this method may not work for all types of leggings. Fabrics like polyester may require multiple cycles to achieve the desired shrinkage. Additionally, be sure to check the care label on your leggings before attempting this method, as some fabrics may not tolerate high heat or hot water washes.
By using this method, you can easily tighten the waistband of your leggings and enjoy a more secure and comfortable fit.
Method 2: Ironing Method
To make leggings tighter around the waist, you can try the ironing method. This technique can help shrink the fabric and achieve a more snug fit. Here’s how to do it:
Gather Your Materials
- Clean, damp leggings
- An iron
- A dish-drying towel or thin cloth
Preheat and Prepare
- Preheat your iron on low to medium heat.
- Smooth out the damp leggings on an ironing board.
- Cover a section of the leggings with a dish-drying towel or thin cloth.
Iron the Leggings
- Place the iron on top of the cloth-covered section of the leggings.
- Apply pressure and move the iron around in circular motions.
- Continue ironing until the water from the damp leggings evaporates and the fabric is almost dry.
- Repeat this process for other sections of the leggings, if necessary.
Note: Take caution when ironing leggings made of polyester or nylon to prevent warping or melting of the fabric. Always read and follow the care instructions on the garment label.
Table: Pros and Cons of the Ironing Method
| Pros | Cons |
|---|---|
| Relatively quick and easy method | May not provide as significant results as other methods |
| Does not require additional materials | May not be suitable for all fabric types |
| Can be done at home with basic ironing equipment | Requires caution to prevent damage to the fabric |
Method 3: Spritz and Dry
If you’re short on time and need a quick solution to make your leggings fit better around the waist, the spritz and dry method is a great option. This method involves lightly misting your leggings with water using a spray bottle and then using heat to dry and shrink the fabric.
To begin, fill a spray bottle with water and lightly spritz your leggings, focusing on the waistband area. Be careful not to saturate the fabric. Next, choose your preferred heat source for drying. You can use a clothes dryer, a hairdryer, or an iron set to the hottest setting possible.
If you’re using a clothes dryer, place your damp leggings inside and set it to a high heat setting. Allow the leggings to dry completely, and you’ll notice that the waistband will shrink and become tighter. For a more targeted approach, you can dampen only the waistband area and use a hairdryer to apply heat specifically to the waistband.
This method is effective because the combination of moisture and heat causes the fabric to shrink, resulting in a tighter waistband. It’s important to note that this method may not provide as much long-term shrinkage as other methods, but it can be a quick and convenient fix when you need to make your leggings fit better for a specific occasion.
Sewing Method: Attaching a Smaller Elastic
If the waistband of your leggings has a sewn-in elastic and cannot be adjusted, you can sew a smaller elastic alongside the existing one to make the waistband tighter. This method provides a simple and effective solution for achieving a better fit.
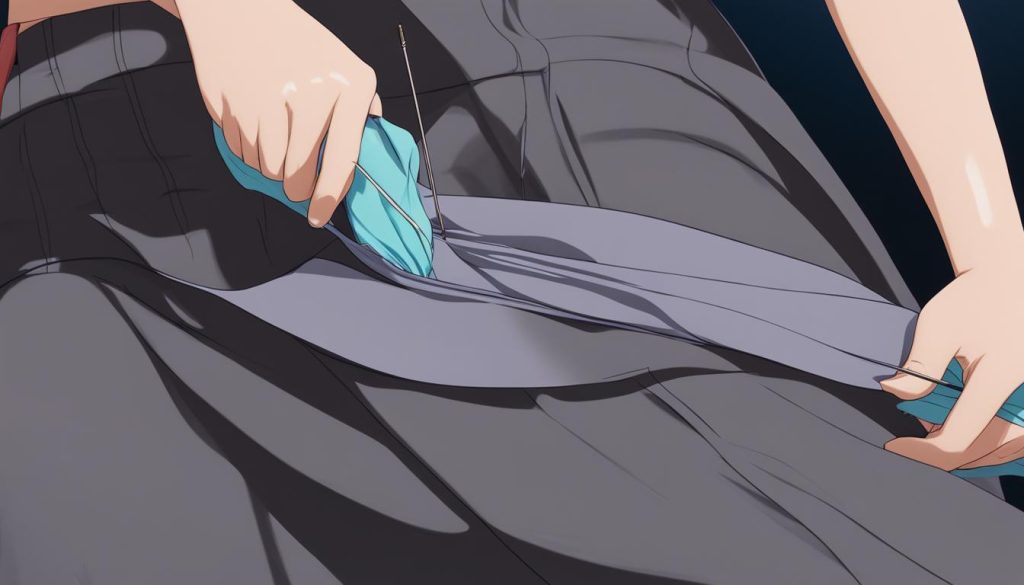
To begin, you will need a small piece of elastic that is narrower than the existing waistband. Cut a small slit in the interior fabric of the waistband, making sure not to cut through the outer fabric. Thread the smaller elastic through the slit and pull it to the desired size, ensuring it is comfortably snug but not too tight.
Once the elastic is at the desired size, knot or sew the ends of the elastic to secure it in place. Then, carefully sew the cut in the fabric shut to create a seamless finish. This will ensure that the smaller elastic stays in place while providing a more comfortable and secure fit around the waist.
Additional Tips:
- When choosing the smaller elastic for this method, opt for an elastic that is compatible with the fabric of your leggings. A soft elastic with good stretch properties works best.
- Take your time when sewing the smaller elastic to ensure a neat and even finish. Use a matching thread color to blend with the fabric.
- If you are not confident in your sewing skills, consider seeking assistance from a professional tailor or seamstress to ensure precise alterations.
Summary:
The sewing method of attaching a smaller elastic provides a practical solution for adjusting the waistband of leggings that have a sewn-in elastic. By following the steps of cutting a small slit in the interior fabric, threading the smaller elastic through, and securing it in place, you can achieve a tighter and more comfortable fit. Remember to choose a compatible elastic, take your time with the sewing process, and seek professional help if needed.
Using Elastic and Underlining for Stability
When it comes to fixing a loose waistband on leggings, using elastic and underlining can provide stability and ensure a snug fit. By incorporating these techniques, you can make your leggings tighter around the waist and prevent them from slipping or sagging during wear.
One option is to use a narrow piece of elastic along the waistband seam allowance. This elastic should have good stretch properties and be compatible with the 4-way stretch fabric of your leggings. Choose a knitted soft elastic or clear elastic with at least 50% stretch for optimal results.
Another method is to incorporate underlining into the waistband. Underlining, such as body shaping net or mesh, adds stability and shape to the waistband, providing extra support and preventing it from stretching out over time. When selecting underlining fabric, opt for a material that is compatible with your leggings’ fabric composition and offers the desired level of comfort and stretch.
To incorporate elastic or underlining into your leggings’ waistband, you can use a sewing machine zigzag stitch or a serger overlock stitch. These stitches will secure the elastic or underlining in place, ensuring it remains stable and won’t stretch out further.
By using elastic and underlining, you can make your leggings’ waistband tighter and more secure. Whether you choose to sew in a narrow elastic or incorporate underlining fabric, these methods provide stability and ensure a comfortable fit. Experiment with different techniques and find the one that works best for you to enhance the wearability and longevity of your leggings.
Tips for Tightening Leggings Waist: Sewing the Waistband
If you’re looking for a more permanent solution to make your leggings tighter around the waist, sewing adjustments can be a great option. Sewing the waistband not only allows you to customize the fit but also ensures a secure and comfortable hold. Here’s a step-by-step guide to help you sew the waistband on your leggings:
Step 1: Preparing the Waistband
Start by cutting out the outer waistband pieces and the inner waistband facing according to your pattern or desired size. Make sure to mark the mid-front and mid-back notches on both pieces for alignment later.
Step 2: Sewing the Outer Waistband Pieces
Place the outer waistband pieces right sides together and sew along the short edges to create a loop. Press the seams open for a neater finish.
Step 3: Sewing the Inner Waistband Facing
Next, sew the inner waistband facing pieces right sides together along the short edges, creating another loop. Again, press the seams open.
Step 4: Attaching the Waistbands
Align the mid-front and mid-back notches of the outer waistband and inner waistband facing, and pin them together, right sides facing each other. Stitch along the top edge with a zigzag stitch or a serger overlock stitch to join them securely. Press the seam allowance towards the inner waistband facing.
This completes the sewing process of the waistband. You can now attach it to your leggings by placing the waistband inside the leggings, right sides facing, and aligning the notches and seams. Use a stretch seam on your sewing machine or a serger to stitch along the edge, ensuring a secure and even fit.
| Advantages of Sewing the Waistband | Disadvantages of Sewing the Waistband |
|---|---|
|
|
Before you start sewing the waistband, it’s important to consider the advantages and disadvantages of this method:
“Sewing the waistband allows for a customized fit and provides a secure and comfortable hold. However, it does require sewing skills and equipment, making it a more time-consuming process. Additionally, keep in mind that sewing adjustments may alter the original design of your leggings.”
By following these steps, you can easily sew the waistband on your leggings and achieve a tighter fit around the waist. Remember to choose the appropriate stitching techniques and take your time to ensure a high-quality result. Now you can enjoy confidently wearing your leggings with a waistband that fits just right.
Choosing the Right Elastic and Facing Fabric
When it comes to making leggings tighter around the waist, selecting the right elastic and facing fabric can play a crucial role. By choosing the appropriate materials, you can ensure a secure fit and improved comfort. Let’s explore some key considerations for this step of the process.
Choosing the Elastic
To achieve a snug and adjustable waistband, opt for a knitted soft elastic or clear elastic with good stretch properties. These types of elastic are compatible with 4-way stretch fabrics commonly used in leggings. Rigid heavy elastic, on the other hand, may create bulk and uneven surfaces, compromising both the fit and aesthetic.
Exploring Facing Fabric Options
Using underlining materials can provide additional stability and a softer touch to the waistband. Consider options such as Supplex or stretchy sports mesh for the inner waistband facing. These fabrics offer the necessary durability and flexibility to support the waistband and enhance the overall fit.
By carefully selecting the right elastic and facing fabric, you can ensure a comfortable and secure fit for your leggings.
| Key Points | Benefits |
|---|---|
| Choose knitted soft elastic or clear elastic | Provides good stretch and compatibility with 4-way stretch fabrics |
| Avoid rigid heavy elastic | Prevents bulkiness and uneven surfaces |
| Select underlining materials like Supplex or stretchy sports mesh | Adds stability and a softer touch to the waistband |
Optional: Topstitching the Waistband
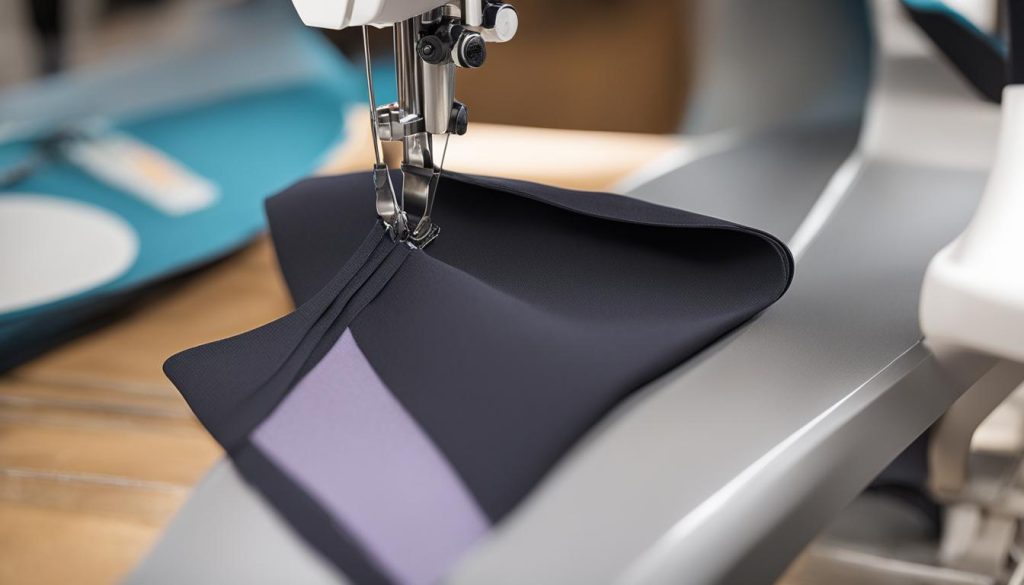
If you want to add an extra element of security and a polished finish to your leggings, consider topstitching the waistband. This step is optional but can provide added durability and prevent the inner waistband from rolling or shifting during wear. To topstitch the waistband, you can use a twin-needle or a 2-needle coverstitch. These stitching techniques create parallel rows of stitching on the fabric, ensuring that the waistband stays in place.
Before you begin topstitching, it’s important to reduce bulk in the waistband seams. You can accomplish this by hammering down the seams with a rubber mallet or the back of an iron. This will flatten the fabric and prevent any skipped stitches. Remember to use caution and protect your work surface when using a hammer.
To topstitch the waistband, position your leggings under the sewing machine needle and align the edge of the waistband with the guide on your machine. Stitch slowly and steadily, ensuring that the needle catches both layers of fabric. Repeat the process for each row of topstitching, spacing them evenly apart. This will secure the waistband and give your leggings a professional, finished look.
Remember, topstitching is a purely decorative step that adds an extra touch of style to your leggings. It is not necessary for functionality, but it can provide a more secure fit and enhance the overall appearance of your garment.
Now that you’ve learned different methods for making leggings tighter around the waist, it’s time to choose the technique that works best for you. Whether you opt for washing and drying with hot water, ironing, spritzing and drying, sewing adjustments with elastic or underlining, or attaching the waistband, these methods will help you achieve a more comfortable and secure fit in your leggings. Experiment with different approaches and find the one that suits your preferences and needs. Enjoy wearing your perfectly fitting leggings!
Attaching the Waistband to Leggings
Now that you have sewn the waistband for your leggings, it’s time to attach it to the leggings themselves. This step is crucial to ensure a secure and comfortable fit. Follow these steps to properly attach the waistband:
- Place the waistband inside the leggings, with the right sides facing each other. Align the notches and seams to ensure proper placement.
- Using a serger or a sewing machine with a stretch seam, stitch along the edge of the waistband and the top opening of the leggings. This will securely fasten the two pieces together.
- Make sure that the waistband and the top opening of the leggings have the same circumference. This will ensure an even fit around your waist.
By following these steps, you can achieve a professional-looking finish and a waistband that stays in place during wear. Take your time and ensure that your stitches are secure to prevent any unraveling or discomfort.
Attaching the waistband to leggings is the final step in the process of making your leggings tighter around the waist. With the methods discussed in this article, you have various options to choose from based on your preferences and the materials available to you. Whether you choose to wash and dry with hot water, use the ironing method, spritz and dry, or sew adjustments with elastic or underlining, the goal is to create a waistband that fits snugly and comfortably.
Remember to always check the label of your leggings to determine their fabric composition before attempting any waistband adjustments or shrinking methods. Different fabrics may react differently to these techniques, so it’s important to proceed with caution and test on a small area before applying the method to the entire garment. With a bit of experimentation, you can achieve the perfect fit for your leggings and enjoy a more secure and comfortable wearing experience.
| Method | Pros | Cons |
|---|---|---|
| Wash and Dry with Hot Water | – Simple and easy method | – May require multiple cycles for desired shrinkage |
| Ironing Method | – Can be done quickly | – Requires caution with fabrics containing polyester or nylon |
| Spritz and Dry | – Quick solution without washing | – May not provide as strong of a hold as other methods |
| Sewing Method with Elastic | – Allows for precise adjustments | – Requires sewing skills and equipment |
| Using Elastic and Underlining | – Provides stability and shape | – Requires sewing skills and equipment |
Conclusion
Making leggings tighter around the waist can be achieved through various methods, each offering different techniques to achieve the desired fit. Whether you prefer DIY methods or sewing adjustments, there are options available to help you achieve more comfortable and secure leggings.
One method involves washing and drying your leggings with hot water and high heat, which can shrink the fabric and make the waistband tighter. Another option is to use an iron to apply heat and pressure to the waistband, helping it to shrink and fit better. If you’re short on time, you can spritz your leggings with water and then dry them with heat to achieve a similar effect.
If you’re comfortable with sewing, there are also sewing methods to adjust the waistband. You can attach a smaller elastic alongside the existing one or use elastic and underlining for added stability. Sewing the waistband requires careful stitching and attention to detail, but it can provide a customized fit for your leggings.
Ultimately, the method you choose will depend on your preferences and the level of adjustment you require. Experiment with different techniques to find the one that works best for you, and enjoy leggings that fit snugly and comfortably around the waist.
Table: Comparison of Leggings Waistband Tightening Methods
| Method | Pros | Cons |
|---|---|---|
| Washing and Drying with Hot Water | Easy and convenient method; can be done with household appliances | May require multiple cycles for desired shrinkage; may affect other areas of the leggings |
| Ironing Method | Provides targeted heat and pressure for precise waistband adjustment | Requires caution with fabrics that may warp or melt under heat |
| Spritz and Dry | Quick method that doesn’t require washing the leggings | May not provide as significant results as other methods |
| Sewing Method: Attaching a Smaller Elastic | Allows for precise adjustment; suitable for leggings with sewn-in elastic | Requires sewing skills and equipment |
| Using Elastic and Underlining for Stability | Provides additional stability and shape to the waistband | Requires sewing skills and equipment; adds bulk to the waistband |
Choose the method that suits your needs and enjoy leggings that fit perfectly around the waist.
Additional Tips and Ideas
When it comes to making your leggings tighter around the waist, there are a few additional tips and ideas that can help you achieve the perfect fit.
If the elastic in the waistband of your leggings is worn out or stretched, consider cutting a small slit and inserting a new, smaller elastic band. This simple fix can make a big difference in keeping your leggings secure and comfortable.
Another common issue with leggings is that they may be too long. To solve this problem, you can either hem them to your desired length or fold the hems up and secure them with fashion tape or fusible fabric tape. This quick and easy alteration can give your leggings a tailored look.
Remember to always check the label of your leggings to determine the fabric before attempting any waistband adjustments or shrinking methods. Different fabrics may react differently to these techniques, so it’s important to proceed with caution.
FAQ
How can I make leggings tighter around the waist?
There are several methods you can try to make leggings tighter around the waist. One method is washing and drying them with hot water and high heat. Another method is ironing the leggings while they are damp. You can also spritz the leggings with water and dry them with heat. If these methods do not work, you can sew adjustments using elastic or underlining fabric. Attaching a smaller elastic or sewing the waistband can also help make the waistband tighter.
Will washing leggings in hot water and drying them on high heat shrink the waistband?
Yes, washing leggings in hot water and drying them on high heat can shrink the fabric and make the waistband tighter. It is important to choose a hot water wash and rinse cycle and use the longest wash cycle setting available. Drying the leggings on high heat will help them tighten. However, please note that polyester leggings may require multiple cycles to achieve the desired shrinkage.
What can I do if I don’t have time to wash my leggings?
If you don’t have time to wash your leggings, you can lightly mist them with water using a spray bottle. Then, dry the leggings with heat using a clothes dryer, hairdryer, or iron on the hottest setting possible. To shrink the waistband separately, dampen the waistband and use a hairdryer aimed specifically at the waistband to heat and shrink it.
How can I sew adjustments to make the waistband tighter?
If the waistband of your leggings has a sewn-in elastic and cannot be adjusted, you can sew a smaller elastic alongside the existing one to make the waistband tighter. Cut a small slit in the interior fabric of the waistband, thread the smaller elastic through, and pull it to the desired size. Knot or sew the ends of the elastic, and sew the cut in the fabric shut to create a perfect fit. This method can be done in just a few minutes.
What should I consider when choosing elastic for the waistband?
When selecting elastic for the waistband, choose a knitted soft elastic or clear elastic with good stretch properties. Avoid using rigid heavy elastic, as it may not be compatible with 4-way stretch fabrics and can create bulk and uneven surfaces. Using underlining, such as Supplex or stretchy sports mesh, for the inner waistband facing can provide additional stability and a softer touch.
How do I attach the waistband to the leggings?
After sewing the waistband, it is time to attach it to the leggings. Place the waistband inside the leggings, right sides facing, and align the notches and seams. Use a serger or sewing machine stretch seam to stitch along the edge. Make sure the waistband and top opening of the leggings have the same circumference. This step ensures a secure and even fit.
Are there any additional tips for making leggings tighter around the waist?
Yes, here are a few additional tips and ideas:
– If the elastic in the waistband is shot, consider cutting a slit and inserting a new, smaller elastic band.
– If the leggings are too long, consider hemming them or folding the hems up and securing them with fashion tape or fusible fabric tape.
– Always check the label to determine the fabric of your leggings before attempting any waistband adjustments or shrinking methods.


